Posts

Use Inkscape to draw snow capped text

Image
Making snow capped text is simple to draw using Inkscape 's Select (S) and Node (N) tools. This post shows the steps to draw the snow capped text on the text Merry . The final drawing is shown in the screenshot below. First thing is to draw the text Merry with the Text (T) tool on the canvas.   Next, using the Bezier (B) tool, draw a straight line to the side.   Adjust the style of the line. Remove the fill and change the stroke paint color to white. Change the stroke join to rounded, cap to rounded. Thicken the stroke width to e.g. 4 pixels.   Select the line and make a duplicate by pressing CTRL-D . Using the Select (S) tool, move the duplicate line to the top of the letter M. Then, click the Node (N) tool. The nodes appear on the line . Press CTRL and drag the right node handle to the left. Repeat the previous steps to duplicate, move the line to the other part of the M letter. Duplicate the line and move it to the top of the letter e. Click the Node (N) tool. Then

Make a snowflake using the Inkscape pen tool

Image
This post shows some steps in using Inkscape to draw a simple snowflake using the Pen , snapping, duplicating and rotation tools. Open Inkscape and create a new document. Click the Snapping icon to ensure that the Toggle Snapping is on. In the toolbar, click the Pen Tool icon or press B on the keyboard. On the drawing page, press down CTRL and draw a horizontal line to represent the main snowflake trunk. If necessary, change the stroke style with the Fill and Stroke pane, e.g. thick blue 10px solid line. Draw the "branches" of the snowflake. Press down CTRL and click a starting point away from the main branch. Then move the cursor towards the main branch. Note : Click the second point when the cursor is snapped to the trunk center line. Use the Selector tool to select all the branches (not the trunk). Press CTRL-D to duplicate the selected branches. Then press V to Flip Vertical the duplicated branches. Finally use the Selector tool to select all the branches and

Quicky check image values in Krita

Image
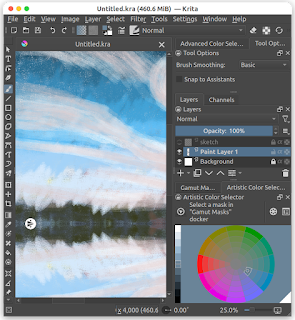
I usually use a black layer in color blend mode as the top layer to check the values of an image. That takes quite a few clicks to get working. But recently I learnt of a faster way to do it with Soft proofing and that just takes only one or two clicks, depending on how you count.    First, you need to setup the soft proofing to gray scale as follows: Setup Soft Proofing In Krita , select the menu options Settings | Configure Krita . The Configure Krita dialog box appears . Select Color Management . Then click the Soft Proofing tab. In the Model field, choose Grayscale/Alpha . In the Proofing Rendering Intent field, choose Perceptual . Click OK . Use Soft Proofing on an image Once set up is done, open up any image and do the following to see the image in grayscale to check the values. In Krita's menu, select View | Soft proofing . Or press CTRL-Y on the keyboard. The color image changes to grayscale . Toggle off the soft proofing by repeating step 1. The image changes back to

Apply a canvas texture to a digital painting with Krita

Image
I wanted to make a digital painting appear to have a canvas texture, to make it look like any traditional paintings. In Krita , it is easy to apply a canvas texture over the digital paint layers.  In a nutshell, you just need to create an overlay paint layer with a tiled canvas texture image applied with some transparency applied. Or in more details, do the following: Create a canvas texture paint layer In Krita , open up a digital painting file that you want to create a canvas texture for. In the Layers docker pane, click the + icon, as shown in the screenshot above. A new paint layer Paint Layer x is created . Where x is a running number . Move the newly created paint layer above all the painted layers either dragging it above or you can use the arrow up/down icons. Name the layer as Canvas texture . Select a canvas texture file Click the Fill patterns icon in the tool bar. A drop down showing a grid of patterns appear . Click on a pattern to use, e.g. 02_rough-canvas.png . Apply

3DPhoto of Manukan Island at sunset

Image
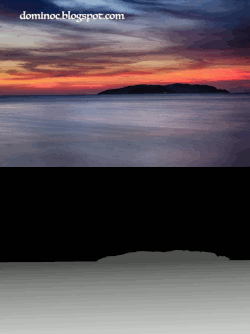
According to Wikipedia  https://en.wikipedia.org/wiki/Manukan_Island , Manukan Island is the second largest island in the Tunku Abdul Rahman National Park , Sabah . This is a Facebook 3DPhoto taken just after the sun has set and what a glorious colorful sunset it was. Click the image below to view.

3DPhoto of the Cloud Gate (Chicago Bean) sculpture in Chicago

Image
The Cloud Gate sculpture (nicknamed as the Chicago Bean ) is located at Chicago's Millenium Park . It was a cold winter day when I took this photo with a Canon DSLR. Now I made it into a Facebook 3D photo by painting a grayscale disparity/depth map using Gimp 's brushes, selection tools, gradient fill and transparency masks. 

3DPhoto of Sunset at MacRitchie Reservoir, Singapore

Image
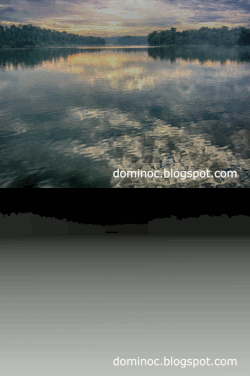
This photo was taken at Singapore's MacRitchie Reservoir at sunset using a Canon Powershot digital camera. The disparity/depth image (see the animated thumbnail) that gives the 3D parallax effect as seen in the embedded Facebook image was generated using Gimp 's gradient, brushes, selection and channel tools.