Posts

Showing posts with the label Krita

Quicky check image values in Krita
Image
I usually use a black layer in color blend mode as the top layer to check the values of an image. That takes quite a few clicks to get working. But recently I learnt of a faster way to do it with Soft proofing and that just takes only one or two clicks, depending on how you count.    First, you need to setup the soft proofing to gray scale as follows: Setup Soft Proofing In Krita , select the menu options Settings | Configure Krita . The Configure Krita dialog box appears . Select Color Management . Then click the Soft Proofing tab. In the Model field, choose Grayscale/Alpha . In the Proofing Rendering Intent field, choose Perceptual . Click OK . Use Soft Proofing on an image Once set up is done, open up any image and do the following to see the image in grayscale to check the values. In Krita's menu, select View | Soft proofing . Or press CTRL-Y on the keyboard. The color image changes to grayscale . Toggle off the soft proofing by repeating step 1. The image changes ba...

Apply a canvas texture to a digital painting with Krita

Image
I wanted to make a digital painting appear to have a canvas texture, to make it look like any traditional paintings. In Krita , it is easy to apply a canvas texture over the digital paint layers.  In a nutshell, you just need to create an overlay paint layer with a tiled canvas texture image applied with some transparency applied. Or in more details, do the following: Create a canvas texture paint layer In Krita , open up a digital painting file that you want to create a canvas texture for. In the Layers docker pane, click the + icon, as shown in the screenshot above. A new paint layer Paint Layer x is created . Where x is a running number . Move the newly created paint layer above all the painted layers either dragging it above or you can use the arrow up/down icons. Name the layer as Canvas texture . Select a canvas texture file Click the Fill patterns icon in the tool bar. A drop down showing a grid of patterns appear . Click on a pattern to use, e.g. 02_rough-canvas.png . Ap...

3DPhoto of Claude Monet's Wheatstacks (End of Summer) 1890-1891 painting

Image
This grayscale disparity image/depth map for generating a Facebook 3DPhoto image of Claude Monet's Wheatstacks (End of Summer) 1890-1891  oil on canvas painting was created using the Krita Painting application.  The resultant 3DPhoto can be seen in the embedded iFrame below. More information about Monet's haystacks can be found on Wikipedia  https://en.wikipedia.org/wiki/Haystacks_(Monet_series) .   

Image background removal using Krita

Image
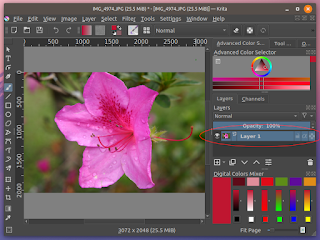
Like other image editing software such as Gimp or Photoshop , Krita has similar tools to remove the background of an image non-destructively using transparency masks. The following steps show how: Open up an image in Krita . In the Layers pane on the right, mouse right click on the paint layer. A pop up menu appears . Choose Add | Transparency Mask . A transparency mask sub layer is created underneath the paint layer . Draw a selection polygon roughly around the foreground object in the image using the Polygonal Selection Tool , as shown below. Then in the File menu, click Select | Invert Selection . Choose Black as the foreground color. Choose a Brush e.g. Basic-1 Ink . Make sure the transparency mask layer is selected or active. Then paint over the background. Choose Select | Deselect to remove the selection polygon. The marching ants selection polygon is removed . Make the brush size smaller and zoom closer  to the background - foreground boundary. Brush over t...

Using Krita's Colorize Mask Editing Tool to color line art drawings

Image
The usual way to color line art drawings in digital image manipulation software is to use a Color Fill tool to fill an area bounded by line work. Krita has a useful tool called the Colorize Mask Editing Tool which allows you to simply draw a patch inside the line work with the color you want to fill. Once all the color patches have been drawn, you could preview the color fill and if everything is to your satisfaction, you can just click a button to save the color fill permanently. The following steps illustrate: Start Krita . Open up a line work drawing e.g. christmas_tree.svg . Then in the main tool bar, click the Colorize Mask Editing Tool , as highlighted in a red circle in the screenshot above. Then click on the drawing. The line work becomes transparent . A new Colorize Mask layer is created . If a brush is not selected, then choose a brush e.g. Basic-1 . Adjust the brush size if necessary. Then use the Advanced Color Selector pane to choose the desired color for the ...