Posts

Showing posts from 2010

Split brush watercolor look in Corel Painter

Image
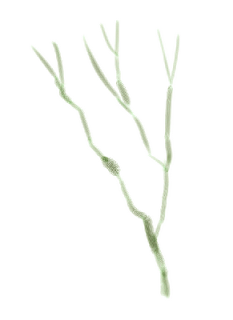
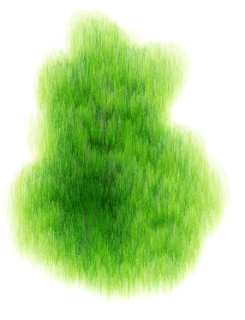
I tried to digitally paint the winter leaves of trees simulating the traditional water color painting technique of splitting the brush hairs until they fan. I found Corel Painter 's default Watercolor brush variants can produce this effect quite easily. First, use the Watercolor Dry Camel brush variant to paint the tree trunks as shown below.  Then choose the Watercolor Dry Bristle brush variant. Lightly paint the foliage with short soft strokes. The results are shown below.

Wet-into-wet Corel Painter watercolor technique

Image
I'm trying to use Corel Painter's watercolor brush variants to produce a wet-into-wet look. In traditional watercolor painting, this technique is useful for misty backgrounds and trees. I tried using the Smooth Runny Camel 30 brush variant with the default Water settings, but I did not like the look of the result. It was too runny. See the tree image of the results below.  I opened up the Water Brush Controls palette and reduced the Diffuse Amount to about 57% . I like the results with the reduced diffuse amount better as shown below.  While the paint is still wet, I applied a second, darker color to add shading to the tree.

Cutting a hole from an ellipse in Adobe Illustrator

Image
I wanted to make an icon of an ellipse with a hole in the middle for one of my Google gadget , something like the figure below. It took me a while to figure out how to do it using Adobe Illustrator . It's quite simple and the steps are described below. In Illustrator , place two filled objects on the canvas, one for the hole and the other for the body. The objects can be ellipses, rectangles or any objects with area. Both of objects are filled with white, which makes it hard to see. The 2 objects can be seen clearly in the Outline View. In the Main toolbox, click the Direct Selection Tool (A) icon, as shown in the figure below. Using the mouse, press down the left mouse button and drag a rectangle to select the two filled objects. The two objects are selected . Select Object | Compound Path | Make . The hole is created .

Mt. Shasta Volcano watercolor painting done with Painter X

Image
This painting of Mount Shasta was done using the watercolor brush variants of Corel Painter X. Some of the watercolor effects look quite realistic especially the blue sky wash. However, I am still trying to get the hand of doing watercolors digitally.

Resolving the Failed to start the virtual machine Palm Emulator (sdk62) error

Image
I encountered this " Failed to start the virtual machine Palm Emulator (sdk62) " error message while going through the Building Your First Pam WebOS App on Windows. Everytime I tried to start up the emulator, I could not because of this error. After a while, I figured out that the previous emulator session did not shutdown properly and was still holding on to the VBox.log file. So, to resolve this error, simply do the following: Open up the Windows Task Manager as shown below. Then click the Processes tab. Select the VirtualBox.exe process. Click End Process . The VirtualBox.exe process is killed . Restart the Palm WebOS Emulator by selecting Start > All Programs > Palm > SDK > Palm Emulator . The emulator is displayed . Related books

Using Photoshop to touch up and cut a passport photo to the right size and ratio

Image
Anybody can take their own photos from any digital cameras for use as passport photos. The example image below is a sample passport size photo taken by yours truly. With digital cameras so common nowadays, you don't really need to go to your friendly neighborhood photo studio and get somebody there to take your photo; you can take it yourself and save your hard earned money for something else. However, you may need to do some touching up of the image to clean up the photo like removing shadows and other unnecessary background details. For this purpose, you can use any image processing software like Photoshop or the free open source GIMP software. After taking the photo, the background may have unwanted details like shadows or the wrong color as shown below. I will describe the steps using Photoshop below to remove the background and to cut the photo to the right ratio and pixel size. Run Photoshop and open up the photo. In the Layers palette, click the menu icon and choose Dupl