Make a snowflake using the Inkscape pen tool
This post shows some steps in using Inkscape to draw a simple snowflake using the Pen, snapping, duplicating and rotation tools.
- Open Inkscape and create a new document.
- Click the Snapping icon to ensure that the Toggle Snapping is on.

- In the toolbar, click the Pen Tool icon or press B on the keyboard.
- On the drawing page, press down CTRL and draw a horizontal line to represent the main snowflake trunk.
- If necessary, change the stroke style with the Fill and Stroke pane, e.g. thick blue 10px solid line.

- Draw the "branches" of the snowflake. Press down CTRL and click a starting point away from the main branch. Then move the cursor towards the main branch.
Note: Click the second point when the cursor is snapped to the trunk center line.
- Use the Selector tool to select all the branches (not the trunk).

- Press CTRL-D to duplicate the selected branches. Then press V to Flip Vertical the duplicated branches. Finally use the Selector tool to select all the branches and trunk.

- Press CTRL-g to group all the selected branches and trunk.

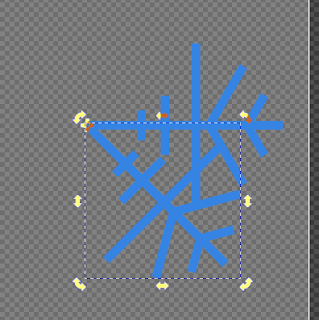
- Click the selected group again to show the rotation handles.

- Press down CTRL and move the rotation pivot point to the base of the trunk, as shown in red above.
- Press CTRL-D to duplicate the group. Then press down CTRL and drag rotate the group handle to 45 degrees clockwise.
- Repeat the previous step until the snowflake is complete.


Comments