Posts

Showing posts with the label Gimp

3DPhoto of the Cloud Gate (Chicago Bean) sculpture in Chicago

Image
The Cloud Gate sculpture (nicknamed as the Chicago Bean ) is located at Chicago's Millenium Park . It was a cold winter day when I took this photo with a Canon DSLR. Now I made it into a Facebook 3D photo by painting a grayscale disparity/depth map using Gimp 's brushes, selection tools, gradient fill and transparency masks. 

3DPhoto of Sunset at MacRitchie Reservoir, Singapore

Image
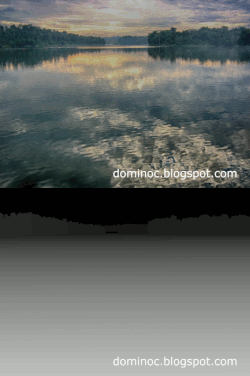
This photo was taken at Singapore's MacRitchie Reservoir at sunset using a Canon Powershot digital camera. The disparity/depth image (see the animated thumbnail) that gives the 3D parallax effect as seen in the embedded Facebook image was generated using Gimp 's gradient, brushes, selection and channel tools.

3DPhoto of Vincent Van Gogh's Bedroom in Arles (1889)

Image
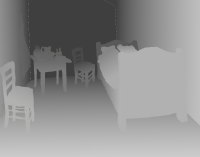
This is Vincent van Gogh 's second version of The Bedroom in Arles (1889) rendered with in Facebook's 3DPhoto viewer. To enable the 3D parallax effect, Gimp was used to paint the disparity image or depth map in grayscale as can be seen in the black and white thumbnail on the left.  For more information about the van Gogh's painting can be found in Wikipedia  https://en.wikipedia.org/wiki/Bedroom_in_Arles   

3DPhoto of Georges Seurat's A Sunday on La Grande Jatte painting

Image
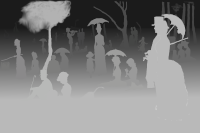
From Wikipedia ( https://en.wikipedia.org/wiki/A_Sunday_Afternoon_on_the_Island_of_La_Grande_Jatte ): A Sunday Afternoon on the Island of La Grande Jatte (French: Un dimanche après-midi à l'Île de la Grande Jatte ) painted in 1884, is Georges Seurat 's most famous work. It is a leading example of pointillist technique, executed on a large canvas. Seurat's composition includes a number of Parisians at a park on the banks of the River Seine. I thought it would be cool to paint a disparity/depth map with Gimp to convert Georges' painting to a so-called Facebook 3DPhoto ; and the result is shown embedded below.

Restoring yellowed paper scan using self-screen blend mode in Gimp

Image
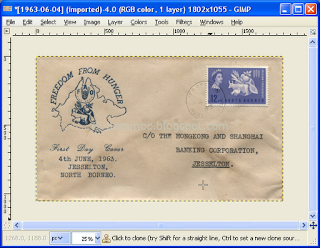
In Gimp or Photoshop , you can overlay an image with itself and blend the layers together with a blending mode e.g. multiply , dodge , burn , screen , etc. I found that a self-image blend i.e. an image with itself, with the screen mode can restore yellowed paper quite nicely and easily. By definition, the screen blend mode will lighten colors but leave black neutral and untouched. Using this technique, I managed to restore the yellowed paper scan below to a reasonably looking version quickly. Run Gimp . Open up the yellowed paper image. In the layers pane, right click on the yellowed paper image. A pop up menu appears . Choose Duplicate Layer . The layer is duplicated . Choose the duplicated layer. Then click the Mode combo box as shown below. In the drop down list, choose Screen . The screen blend mode is applied . The yellowed paper is restored and looks less aged .

Apply a paper/canvas texture to a digital painting image using Gimp

Image
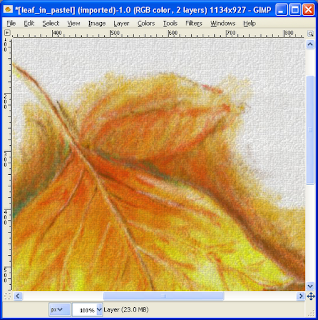
Patterns of paper or canvas texture can be applied on digital painting images to create a paper or canvas texture using Gimp 's Bucket Fill tool . The screenshot below shows the result of an image with an applied canvas texture. To apply a texture onto an image, the following can be done. Open up an image in Gimp . Select Layer | New Layer . The New Layer dialog box appears . Click OK . A new transparent layer is created . In the Toolbox , click the Bucket Fill Tool icon. In the Tool Options  pane, toggle on the Bucket Fill Pattern fill . Click on the pattern fill button. A drop down menu showing the pattern fill options appear . Choose a pattern e.g. Canvas . Click anywhere in the image. The pattern is applied to the image . Select Colors | Color to Alpha . The Color to Alpha dialog box appears . Click OK . The white color fill is converted to a transparent fill . In the Layers pane, reduce the opacity level of the pattern layer e.g. 21% until the canvas te...

Making a seamless paper texture pattern using Gimp

Image
It is nice to apply a paper texture to an image created using digital painting software like  Photoshop , MyPaint , Gimp , or Corel Painter . The texture makes the image look more realistic somehow. In Gimp , there are built in filters that can automatically adjust scan images of paper textures so that the textures appear seamless when placed as pattern tiles. The following steps show how to make a seamless paper texture pattern using Gimp . Start Gimp . Load in a scanned paper texture image file e.g. watercolor.jpg . Select Colors | Desaturate . The Desaturate dialog box appears . Choose Lightness . Click OK . The image is desaturated . Note: there are alternative ways to convert the image to a grayscale RGB . Select Filters | Map | Make Seamless . The image is adjusted so that the images edges match when tiled . Select File | Export . The Export Image dialog box appears . In the name field, type in the pattern file name (with a pat extension) e.g. mypaper.pat . Browse ...