Posts

Showing posts from 2011

Digital pastel of a bluebell woods

Image
The final  Bluebell Woods painting below was done using MyPaint 1.0 with pastel and smear brushes.

Digital pastel painting of the Loch-side Croft House

Image
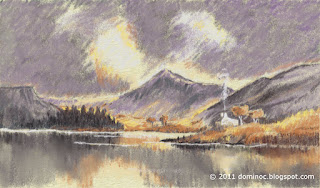
I used MyPaint 1.0 and its digital pastel brush to do this " Loch-side Croft House " exercise from the book Landscapes in Pastel by Jenny Keal. It took me a few hours to complete the painting below.

Digital pastel sketch of a leaf done with MyPaint

Image
This sketch of a fall leaf was done using a pastel brush in the open source MyPaint 1.0 software. MyPaint can be downloaded from  http://mypaint.intilinux.com/ .

Making a simple balloon using Inkscape

Image
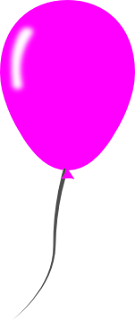
Here is a simple example of making a simple vector line art of a balloon (shown below) using the Inkscape paths and node tools. Create the balloon body Create a new Inkscape document. Click the Create Circles, Ellipses and Arcs (F5) button of the Toolbox . Place an ellipse on the canvas. If you like, toggle off the stroke and color fill it with solid pink. Select Path | Convert Object to Path . Then click the Edit Paths by Nodes (F2) button in the Toolbox . Drag a rectangle to enclose the middle node as shown below. Press ARROW UP on the keyboard a few times. Drag a rectangle to cover the middle and bottom nodes as shown below. Then press the Insert New Nodes into Selected Segments button on the Controls Bar . 2 nodes are created . Drag a rectangle covering only the two newly created nodes. Then press > on the keyboard a few times to shape the balloon to your satisfaction. Create the balloon end In the Toolbox , click the Create Rectangles and Squares (F4)

Making a glossy spherical button using Inkscape

Image
I saw some examples of glossy spherical buttons done using Adobe Illustrator and Photoshop . I tried to do the same thing but with Inkscape  instead. The image below is the result of the effort. Here is how it was created. Create the sphere Start Inkscape . Select the Create circles, ellipses and arcs (F5) icon on the Tool Box . Choose a fill color e.g. Teal . Turn off the stroke if it is on. Press CTRL and click on the canvas and drag out a circle. Select Object | Fill and Stroke . The Fill and Stroke pane appears . In the Fill and Stroke pane, click the Fill Radial Gradient icon. The circle fill is replaced with a radial gradient . In the Fill and Stroke pane, click Edit . The Gradient editor appears . In the Gradient editor , change the first stop R to 0 , G to 255 , B to 255 and A to 255 . Click Add Stop to add another stop to the gradient. In the Stop drop down list, choose the second stop. Change the second stop R to 0 , G to 255

Making a Russian flag button using Inkscape

Image
I used Inkscape (a free open source illustration application) to create this 3-D looking button of a Russian flag. It is quite straightforward to make. There are three general steps to it: (1) make the flag, (2) create the bevel, and (3) create the highlights. Create the flag Create a new Inkscape document. Select Layer | Layers . The Layers pane appears . Turn on the fill. Turn off the stroke. On the Toolbox on the left, click the Create rectangles and squares (F4) icon. Then click and drag on the canvas to place a rectangle. On the Toolbox , click the Select and transform objects (F1) icon. The handles change and the Tool Controls bar appear . On the Tool Controls Bar,  change the W field (width) to 450 . In the H field (height), type in 300 . Move the origin of the rectangle to the global origin (0,0) by changing the X field to 0 and the Y field to 0 . Press CTRL+D to duplicate the rectangle. In the Tool Controls Bar , change the H field to 100 Y field to