Posts

Showing posts from December, 2009

Sketching with 2B and Oily Variable Pencils in Painter

Image
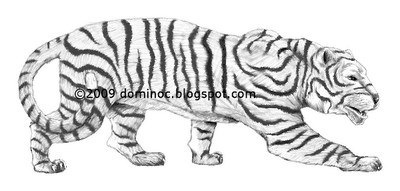
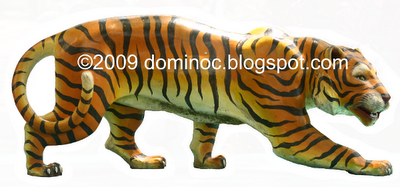
I tried out doing a digital pencil sketch using a Intuos 3 tablet and Corel Painter X. The experience and result are almost as good and as satisfying as doing it on real paper and pencil as shown in the sketch below. The steps I did are described below. Start up Painter and open up a photograph. Select File > Quick Clone . A clone of image window is created . In the Brush Selector , select the Pencils brushes' 2B Pencil variant as shown below. Now choose a dark grey Main Color  for the 2B Pencil in the Colors , Mixer or the Color Sets palettes. Zoom in closer in the clone window as shown below. On the keyboard, press B to activate the Brush tool. Use the tablet and pen to sketch over the clone image. Outline the object and block out the positive spaces and negative spaces. Note: the 2B Pencil variant uses a Buildup method i.e. the color values will darken as you repeatedly sketch over the same area . Now use the Pencils' Oily Var

Isolating a photo image with Painter

Image
Corel Painter can be used to isolate objects from photographs as shown below. The result can be even better if a Wacom tablet is used to paint away the background. An example of an isolated image on white background is the tiger image below. In a nutshell, you just need to create a mask to cover the background and then carefully paint away the background at the edges of the object with a soft brush. Start up Corel Painter and open up the photograph containing the object to be isolated. Press CTRL+A  on the keyboard. The entire image is selected . Click Select > Float . The entire image is floated from the Canvas to a new layer . In the Layers palette, click the  Create Layer Mask icon as shown below. A layer mask is added to Layer 1 . In the Layers palette, click on the mask as shown below. A black outline surrounds the mask icon . In the Main toolbar, click on the Lasso    icon. Draw a lasso around the object. Press CTRL+SHIFT+I to invert the las

Brush along a path in Painter

Image
Painter has an interesting Brush setting that aligns your brush strokes to existing curve paths on the canvas. The path can be moved to another location or resized and repainted with another brush stroke. Here are the steps to use the Align To Path setting.  Start up Corel Painter and create a new file. C Use any of the Main toolbar icons e.g. Pen , Quick Curve , Rectangular Shape , Oval Shape to draw paths on the canvas. Draw on the canvas. The path is drawn on the canvas and a new layer Shape1 is created.  . In the Layers palette, click the Canvas layer. The Canvas layer is activated . Click the Brush icon. The Brush property bar appear . Toggle on the Align-to-Path as shown in the red circle above. And choose a Brush Variant e.g. Pastels' Soft Pastel . Choose a Main Color e.g. yellow. Brush on the canvas. The brush stroke follows the shape path .