Posts

Showing posts with the label Digital painting

Quicky check image values in Krita
Image
I usually use a black layer in color blend mode as the top layer to check the values of an image. That takes quite a few clicks to get working. But recently I learnt of a faster way to do it with Soft proofing and that just takes only one or two clicks, depending on how you count.    First, you need to setup the soft proofing to gray scale as follows: Setup Soft Proofing In Krita , select the menu options Settings | Configure Krita . The Configure Krita dialog box appears . Select Color Management . Then click the Soft Proofing tab. In the Model field, choose Grayscale/Alpha . In the Proofing Rendering Intent field, choose Perceptual . Click OK . Use Soft Proofing on an image Once set up is done, open up any image and do the following to see the image in grayscale to check the values. In Krita's menu, select View | Soft proofing . Or press CTRL-Y on the keyboard. The color image changes to grayscale . Toggle off the soft proofing by repeating step 1. The image changes ba...

Apply a canvas texture to a digital painting with Krita

Image
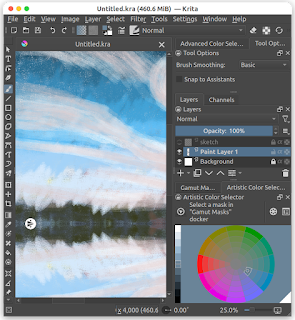
I wanted to make a digital painting appear to have a canvas texture, to make it look like any traditional paintings. In Krita , it is easy to apply a canvas texture over the digital paint layers.  In a nutshell, you just need to create an overlay paint layer with a tiled canvas texture image applied with some transparency applied. Or in more details, do the following: Create a canvas texture paint layer In Krita , open up a digital painting file that you want to create a canvas texture for. In the Layers docker pane, click the + icon, as shown in the screenshot above. A new paint layer Paint Layer x is created . Where x is a running number . Move the newly created paint layer above all the painted layers either dragging it above or you can use the arrow up/down icons. Name the layer as Canvas texture . Select a canvas texture file Click the Fill patterns icon in the tool bar. A drop down showing a grid of patterns appear . Click on a pattern to use, e.g. 02_rough-canvas.png . Ap...

Cretan Ram sketch

Image
I just did a sketch of a Cretan Ram done using the Serious Paint Android app on a Nexus 7 tablet. Brushes used were the Pencil and Smear brushes. And colored with a Soft Shader brush

Digital Dog Portrait

Image
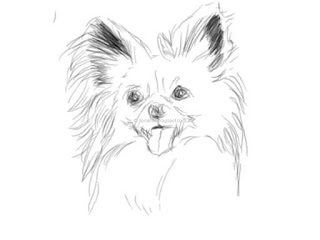
Another digital art piece done using the Android App - Serious Paint  on a tablet. This time I was trying out different brushes - pencil , soft shader , and blend, and varying the brush diameter. I used the Save function to save the work-in-progress at different stages this time, as shown below. I must say the Blend brush result looks like blending charcoal with my finger. Pencil sketch outline Beginning color shading Final piece I used a rubber tip stylus and at times my finger. Sometimes, I wish the stylus was more sensitive and it didn't drag and stick on the screen as much.

Portrait of a cat painted on a tablet using the Serious Paint Android app

Image
Here is a digital art of a cat(!) painted on an HP Touchpad running Android Jelly Bean using this nice free app - Serious Paint  and a cheap rubber tip stylus. The Serious Paint app looks similar to another Android app for painting - Infinite Painter but it is much more stable; Infinite Painter keeps crashing all the time to the point that you can't do anything worthwhile.

Digital Traditional Color Palette

Image
I was having difficulty in locating a digital traditional color palette for digital painting so I made this digital traditional color palette from the default swatch of Photoshop .

Apply a paper/canvas texture to a digital painting image using Gimp

Image
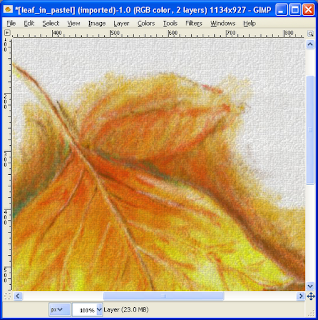
Patterns of paper or canvas texture can be applied on digital painting images to create a paper or canvas texture using Gimp 's Bucket Fill tool . The screenshot below shows the result of an image with an applied canvas texture. To apply a texture onto an image, the following can be done. Open up an image in Gimp . Select Layer | New Layer . The New Layer dialog box appears . Click OK . A new transparent layer is created . In the Toolbox , click the Bucket Fill Tool icon. In the Tool Options  pane, toggle on the Bucket Fill Pattern fill . Click on the pattern fill button. A drop down menu showing the pattern fill options appear . Choose a pattern e.g. Canvas . Click anywhere in the image. The pattern is applied to the image . Select Colors | Color to Alpha . The Color to Alpha dialog box appears . Click OK . The white color fill is converted to a transparent fill . In the Layers pane, reduce the opacity level of the pattern layer e.g. 21% until the canvas te...

Making a seamless paper texture pattern using Gimp

Image
It is nice to apply a paper texture to an image created using digital painting software like  Photoshop , MyPaint , Gimp , or Corel Painter . The texture makes the image look more realistic somehow. In Gimp , there are built in filters that can automatically adjust scan images of paper textures so that the textures appear seamless when placed as pattern tiles. The following steps show how to make a seamless paper texture pattern using Gimp . Start Gimp . Load in a scanned paper texture image file e.g. watercolor.jpg . Select Colors | Desaturate . The Desaturate dialog box appears . Choose Lightness . Click OK . The image is desaturated . Note: there are alternative ways to convert the image to a grayscale RGB . Select Filters | Map | Make Seamless . The image is adjusted so that the images edges match when tiled . Select File | Export . The Export Image dialog box appears . In the name field, type in the pattern file name (with a pat extension) e.g. mypaper.pat . Browse ...

MyPaint watercolor still life of a banana

Image
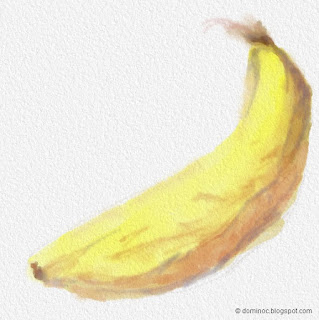
I really like the results of MyPaint 's water color brushes (specifically Deevad's water 1 brush) in painting a simple still life of a banana. It looks almost like a real water color painting, as shown below. In order to achieve a realistic looking water color effect, the brush's opacity, radius and/or hardness should be adjusted to get the effect you want - wet-on-wet , wet-on-dry , hard edges , soft edges , etc. The brush controls are shown in the screenshot below.

A Canal in Venice - digital pastel done in MyPaint

Image
This piece of A canal in Venice was done using the digital pastel brushes in MyPaint and overlaid with the source photo at 50% opacity.

Digital pastel of a bluebell woods

Image
The final  Bluebell Woods painting below was done using MyPaint 1.0 with pastel and smear brushes.

Split brush watercolor look in Corel Painter

Image
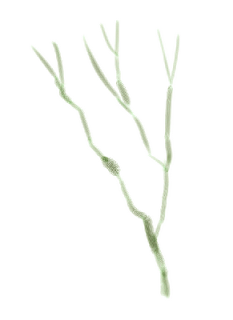
I tried to digitally paint the winter leaves of trees simulating the traditional water color painting technique of splitting the brush hairs until they fan. I found Corel Painter 's default Watercolor brush variants can produce this effect quite easily. First, use the Watercolor Dry Camel brush variant to paint the tree trunks as shown below.  Then choose the Watercolor Dry Bristle brush variant. Lightly paint the foliage with short soft strokes. The results are shown below.