Fast method to create a button icon with a 3-D effect using Inkscape
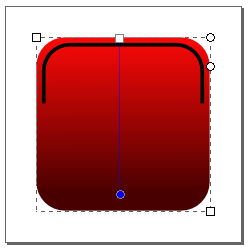
 Inkscape can be used to create nice looking button icons with a touch of 3-D like the example on the left. It can be achieved simply by applying a linear fill gradient to the button and a linear gradient to the path's stroke segment on top, with appropriate gradient colors and opacity values; and a little blurring.
The following illustrates how it can be done.
- In Inkscape, create a blank document set to a desired output dimension, e.g. 128 by 128 pixels.
- Click the Create rectangles and squares (F4) icon. Place a rounded rectangle on the canvas. Change the rectangle width an height to the desired values e.g. 96 by 96 pixels.
- Press CTRL+C. Then press CTRL+ALT+V.
A copy of the rounded rectangle is placed on top of the original rectangle. - Reduce the dimensions of the copy to e.g. 88 by 88 pixels.

- In the Align and Distribute pane, set the alignment to be Relative to Page. Then click the Center on horizontal axis and Center on vertical axis icons.
The copy is centered on the page.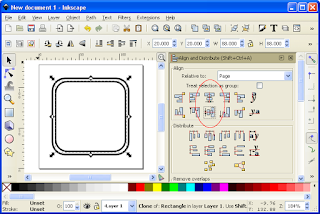
- Select Path | Object to Path.
The copied rectangle is converted to a path.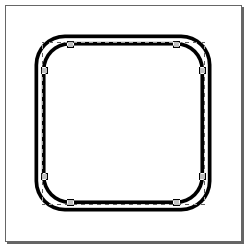
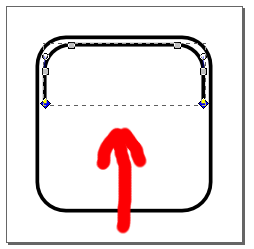
- Press F2. Then drag a rectangle to cover the bottom nodes as shown.
The bottom nodes are selected.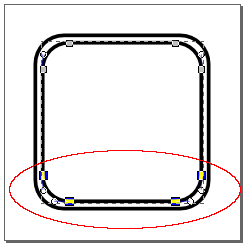
- Click on the Delete segment between two non-endpoint nodes icon.
The selected segments are deleted.
- Press F2. Drag a rectangle to cover the bottom two nodes. Press the ARROW UP key to nudge them upwards until they are at the half of the rectangle.
- Press F1. Click on the original rectangle. Then remove the stroke.
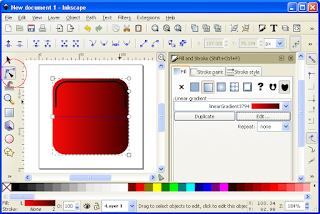
- In the Fill and Stroke pane, under the Fill pane, click the Linear gradient icon.
- Then click the Edit button.
The Gradient editor dialog box appears. - For the first stop, set it to a color of your choice with full opacity (alpha value of 255).
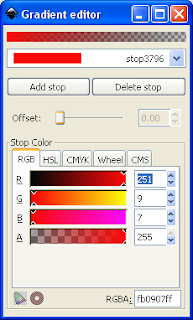
- For the second stop, set it to a darker shade of the color of your choice with full opacity. Close the Gradient editor.

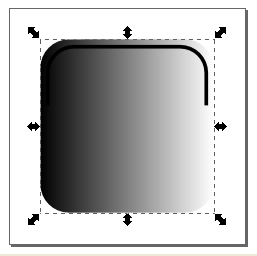
- On the canvas, drag the node of the lighter color gradient to the top and the darker shade node to the bottom.
- Press F2. Click the stroke path.
- In the Fill and Stroke pane, change the Stroke style width to a larger value e.g. 2 pixels.
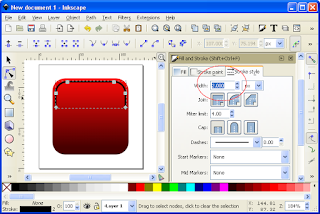
- Under the Stroke Paint tab, change to a linear gradient. Click the Edit button.
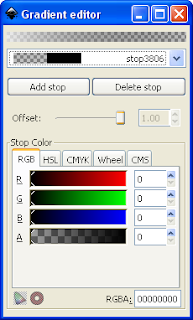
The Gradient editor appears. - For the first stop, set the stop RGB color to white with an alpha value of 178.

- For the second stop, set the stop RGB color to black with an alpha value of 0. Close the Gradient editor.
- Press F2. Drag the lighter gradient node to the top. Drag the more transparent gradient node to the bottom.
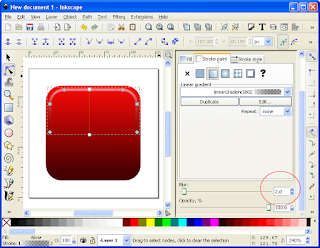
- In the Fill and Stroke pane, change the stroke blur to a slightly larger value e.g. 2.
The button base with a slight 3-D effect is now done. - Place any artwork above the button to complete the icon.


Comments