Image background removal using Krita
Like other image editing software such as Gimp or Photoshop, Krita has similar tools to remove the background of an image non-destructively using transparency masks.
The following steps show how:
The following steps show how:
- Open up an image in Krita.
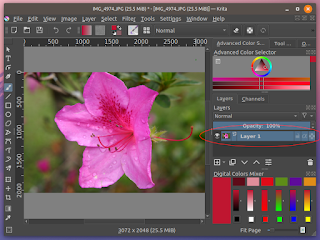
- In the Layers pane on the right, mouse right click on the paint layer.
A pop up menu appears.
- Choose Add | Transparency Mask.
A transparency mask sub layer is created underneath the paint layer.
- Draw a selection polygon roughly around the foreground object in the image using the Polygonal Selection Tool, as shown below. Then in the File menu, click Select | Invert Selection.

- Choose Black as the foreground color. Choose a Brush e.g. Basic-1 Ink. Make sure the transparency mask layer is selected or active. Then paint over the background.

- Choose Select | Deselect to remove the selection polygon.
The marching ants selection polygon is removed. - Make the brush size smaller and zoom closer to the background - foreground boundary. Brush over the remaining background.
That's it. The background is removed in a non-destructive manner from the image.
Note: if you made a mistake in removing some foreground pixels, simply change the foreground color to white and paint over the problem area to bring back the foreground pixels.


Comments