Making a glossy spherical button using Inkscape
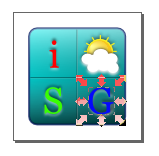
I saw some examples of glossy spherical buttons done using Adobe Illustrator and Photoshop. I tried to do the same thing but with Inkscape instead. The image below is the result of the effort.
Here is how it was created.
Create the sphere
Here is how it was created.
Create the sphere
- Start Inkscape.
- Select the Create circles, ellipses and arcs (F5) icon on the Tool Box.
- Choose a fill color e.g. Teal. Turn off the stroke if it is on.
- Press CTRL and click on the canvas and drag out a circle.

- Select Object | Fill and Stroke.
The Fill and Stroke pane appears.
- In the Fill and Stroke pane, click the Fill Radial Gradient icon.
The circle fill is replaced with a radial gradient.

- In the Fill and Stroke pane, click Edit.
The Gradient editor appears.
- In the Gradient editor, change the first stop R to 0, G to 255, B to 255 and A to 255.

- Click Add Stop to add another stop to the gradient.
- In the Stop drop down list, choose the second stop.
- Change the second stop R to 0, G to 255, B to 255, and A to 255.
- In the Stop drop down list, choose the last stop.
- Change the last stop R to 0, G to 65, B to 65, and A to 255. Close the Gradient editor.

- Move the cursor to the center of the gradient. Press CTRL and drag the gradient down from the center of the circle.

Create the highlights
- Select Layer | Layers.
The Layers pane appears.
- In the Layers pane, click the Create a new layer icon.
The Add Layer dialog box appears.

- In the Layer name field, type in Highlights. Click Add.
- In the Tool Box, click the Create circles, ellipses, and arcs (F5) icon. Click on the canvas and drag out an ellipse. Change the fill color to black.

- In the Fill and Stroke pane, click the Fill Linear Gradient icon.
- In the Fill and Stroke pane, click Edit.
The Gradient Editor appears.
- In the Gradient editor, change the first stop R to 0, G to 0, B to 0, and A to 255.
- In the Stop drop down list, select the last stop.
- Change the last stop R to 255, G to 255, B to 255, and A to 255. Close the Gradient editor.

- Press CTRL and move the linear gradient handles such that black is at the bottom.

- In the Layers pane, change the Highlight layer's Blend mode to Screen.

Combine the ball with the highlights
- In the Tool Box, click the Select and transform objects (F1) icon. Drag and select all the objects on the canvas.
- Select Object | Align and distribute.
The Align and Distribute pane appears.

- In the Align and Distribute pane, click the Center on Horizontal Axis and Center on Vertical Axis icons.

- Deselect and select only the highlight ellipse. Press Arrow Up and nudge the ellipse up.
The glossy ball is done.


Comments