Correct an overexposed JPEG photo image with RawTherapee
Although the free and open source software Raw Therapee is designed for processing raw camera images, it is possible to use its exposure correction tools to fix problems with JPEG images. As an example, this post demonstrates how to use Raw Therapee to correct a JPEG image for overexposure.
- Start Raw Therapee.
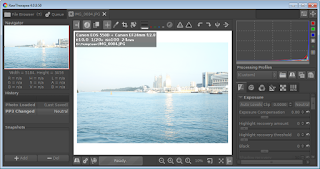
The Raw Therapee application window appears. - Use the File Browser, Places and Recent Folders panes on the left to browse and select a folder containing the photo(s) to be edited. Double click on the image to open it for editing.
The image is displayed in the application window.
- Observe the histogram on the right.
The red, green, blue, and white curves are bunched to the right with a large spike at the end.
Note: this is an indication of over exposure clipping. - Under the Exposure pane, drag the Brightness slider to the left to reduce the brightness. At the same time, observe the histogram to ensure that the curves do not get clipped to the left.

The image brightness is reduced. - Drag the Contrast slider to the right to increase the contrast. Observe the histogram to ensure that as the curves spread, both sides do not get clipped at the sides.

The Exposure settings may look like these.
More contrast is applied to the image.
- To save the file, press CTRL+S.
The Save dialog box appears.
- Specify the output file parameters. Click OK.
The file is saved.


Comments