Posts

Restoring yellowed paper scan using self-screen blend mode in Gimp
Image
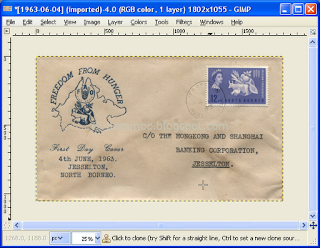
In Gimp or Photoshop , you can overlay an image with itself and blend the layers together with a blending mode e.g. multiply , dodge , burn , screen , etc. I found that a self-image blend i.e. an image with itself, with the screen mode can restore yellowed paper quite nicely and easily. By definition, the screen blend mode will lighten colors but leave black neutral and untouched. Using this technique, I managed to restore the yellowed paper scan below to a reasonably looking version quickly. Run Gimp . Open up the yellowed paper image. In the layers pane, right click on the yellowed paper image. A pop up menu appears . Choose Duplicate Layer . The layer is duplicated . Choose the duplicated layer. Then click the Mode combo box as shown below. In the drop down list, choose Screen . The screen blend mode is applied . The yellowed paper is restored and looks less aged .

Digital Traditional Color Palette

Image
I was having difficulty in locating a digital traditional color palette for digital painting so I made this digital traditional color palette from the default swatch of Photoshop .

Crop an image with the Fill Pattern command in Inkscape

Image
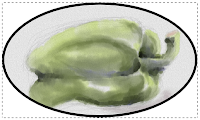
In Inkscape there is no direct image crop command similar to Photoshop's Image Crop command. But it is still possible to crop an image in Inkscape indirectly using the Fill Pattern command. An example of a cropped image is the screenshot on the right. The example below shows how it is done. Start Inkscape . Drag and drop an image file onto the page. The "image" Input dialog box appears . Click OK . The image is displayed . Use any vector placement commands to draw the cropping boundary e.g. the Create circles, ellipses, arcs (F5) command. Press F1 and select the image. Select Object | Pattern | Objects to Pattern . The image pattern is created . Delete the image. Select the cropping boundary. If the Fill and Stroke pane is not displayed, select Object | Fill and Stroke . The Fill and Stroke pane is displayed . In the Fill tab, click the Pattern icon. If necessary, choose a pattern from the Pattern Fill combo box. The image is displayed cropped within t...

How to make an Android menu icon using Inkscape

Image
The Android 2.3 Gingerbread menu icons have a standard look and feel to them, according to the Android Menu Icons Design Guide at  http://developer.android.com/guide/practices/ui_guidelines/icon_design_menu.html . It is possible to use Inkscape to create menu icons for Android as illustrated in the steps below. Create and setup the document Run Inkscape . Select File | Document Properties . The Document Properties dialog box appears . In the Width and Height fields, type in the largest menu icon hdpi size e.g. 72 pixels. Close the dialog box. Use the Create Rectangles and Squares (F4) command and place a square on the page to serve as the recommended bounding box 48x48 pixels for the icon. Select the rectangle. Change the Width and Height to 48 pixels. Select Object | Align and Distribute . The Align and Distribute pane appears . Set the Align Relative to Page . Click on the Center to Vertical Axis and Center to Horizontal Axis buttons.  Select Layer | L...

Apply a paper/canvas texture to a digital painting image using Gimp

Image
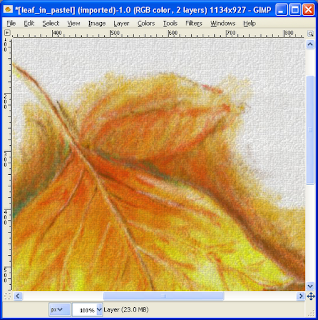
Patterns of paper or canvas texture can be applied on digital painting images to create a paper or canvas texture using Gimp 's Bucket Fill tool . The screenshot below shows the result of an image with an applied canvas texture. To apply a texture onto an image, the following can be done. Open up an image in Gimp . Select Layer | New Layer . The New Layer dialog box appears . Click OK . A new transparent layer is created . In the Toolbox , click the Bucket Fill Tool icon. In the Tool Options  pane, toggle on the Bucket Fill Pattern fill . Click on the pattern fill button. A drop down menu showing the pattern fill options appear . Choose a pattern e.g. Canvas . Click anywhere in the image. The pattern is applied to the image . Select Colors | Color to Alpha . The Color to Alpha dialog box appears . Click OK . The white color fill is converted to a transparent fill . In the Layers pane, reduce the opacity level of the pattern layer e.g. 21% until the canvas te...

Making a seamless paper texture pattern using Gimp

Image
It is nice to apply a paper texture to an image created using digital painting software like  Photoshop , MyPaint , Gimp , or Corel Painter . The texture makes the image look more realistic somehow. In Gimp , there are built in filters that can automatically adjust scan images of paper textures so that the textures appear seamless when placed as pattern tiles. The following steps show how to make a seamless paper texture pattern using Gimp . Start Gimp . Load in a scanned paper texture image file e.g. watercolor.jpg . Select Colors | Desaturate . The Desaturate dialog box appears . Choose Lightness . Click OK . The image is desaturated . Note: there are alternative ways to convert the image to a grayscale RGB . Select Filters | Map | Make Seamless . The image is adjusted so that the images edges match when tiled . Select File | Export . The Export Image dialog box appears . In the name field, type in the pattern file name (with a pat extension) e.g. mypaper.pat . Browse ...

MyPaint watercolor still life of a banana

Image
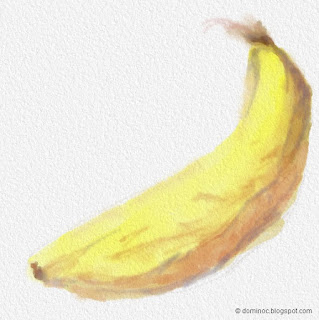
I really like the results of MyPaint 's water color brushes (specifically Deevad's water 1 brush) in painting a simple still life of a banana. It looks almost like a real water color painting, as shown below. In order to achieve a realistic looking water color effect, the brush's opacity, radius and/or hardness should be adjusted to get the effect you want - wet-on-wet , wet-on-dry , hard edges , soft edges , etc. The brush controls are shown in the screenshot below.